We first made one when she was in Brownies, a division of Girl Scouts, for a gift exchange.

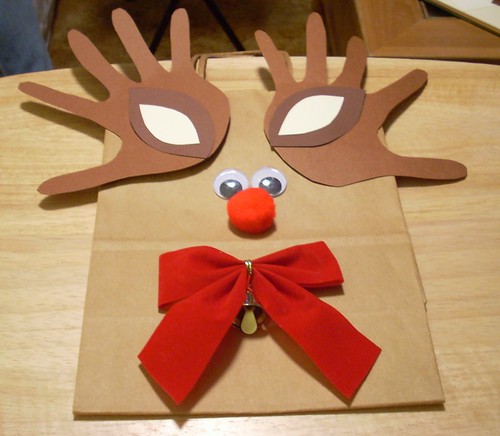
Notice the small hands, aka antlers...this is an important element as you will soon see.
Material List:
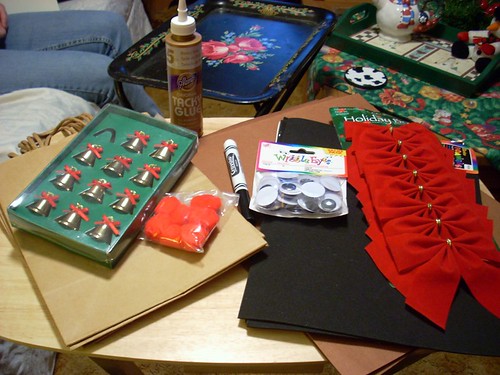
1. Bags
2. Brown Paper (I used a sheet of brown poster board this time)
3. Card Stock, cream or off white and brown
4. Wiggle Eyes
5. Red Pom Poms
6. Craft Glue
7. Black or Brown Marker (if you want to draw a mouth, eyebrows, eyelashes)
8. Scissors
9. Little Bells (optional)
10. Bows or Ribbon (optional) I really wanted plaid bows, but could only find red this time of year.
Ignore the black Fun Foam...I'm so use to using Fun Foam in Kid's Craft Projects I had it in photo then couldn't figure out where I had used it in the Reindeer Gift Bag.
First step. Have your kiddos trace their hands or you trace your little one's hands.
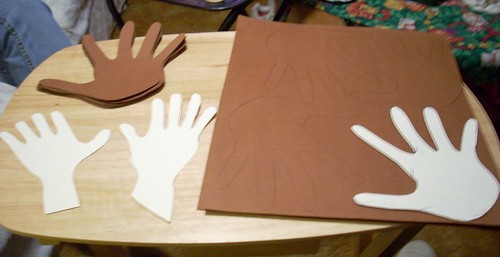
See those odd looking hands on the left? My attempt of recreating child size hands. Not such a good idea. So save a master copy of your kiddo's hands for future crafting. Or just use their "18 year old hand" like I did.
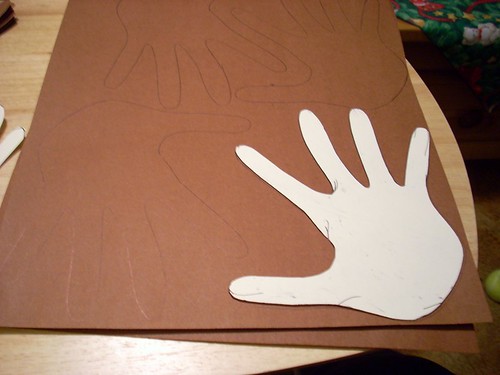
Step Two: Trace around hand pattern on brown poster board. Then cut them out. Tip: I cut poster board into 4 pieces. And I traced all right hands, you can flip them later.
Step Three: Make Ears
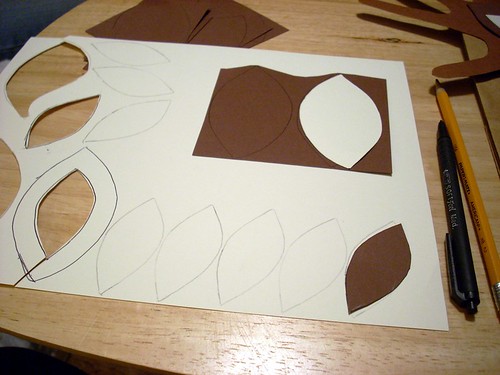
Brown Ear, upper right hand area of photo, draw a fat football or an oval with pointed ends on white card stock. Trace on to brown card stock. Cut them out.
Inside of ear (optional) trace around outside part of ear on to off white/cream card stock. Now draw a smaller version inside this... See lower left hand area of photo. Cut it out and that is your pattern for inside ear piece. Trace and cut out.
These are the pattern pieces. You can use this image to trace your patterns, Click to enlarge or make smaller.
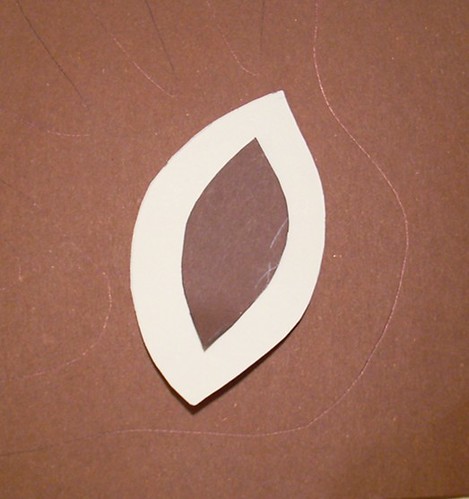
Glue inner ear to outer ear.
Step Four: Attach bell to Bow or Ribbon. This time I used premade Bows. I just unwired a bit and threaded the gold fiber wrapped end through the hole in the top of bell.
Step Five: Lay out components on Bag for placement. Then use craft glue to adhere them.
Ta Da .... Completed Reindeer Gift Bag.
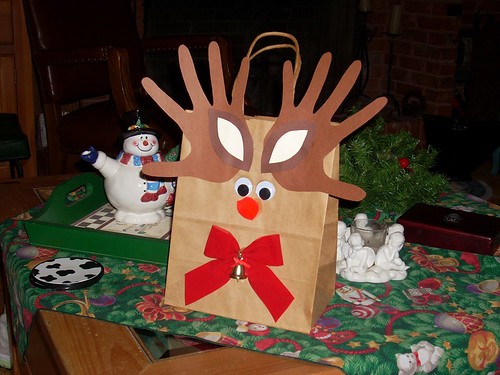
Or with the size of those antlers perhaps that is a Moose with a cold.
Optional Step: Use Black or Brown Marker to add eyebrows, eyelashes, and a mouth.
Tip: Use a pencil first. You will not be seeing the photo of the Reindeer I made with a Unibrow!
I hope you have fun making these gifts bags. If you do make them leave a link to your blog if you decide to post photos...no, blog? Send me a photo to enigmaartist at gmail dot com. I'll post your photo if you ok that. Either way I would love to see how your bags turn out.
(if any of these steps don't make sense let me know, it's 4:30 am I should be sleeping, so it's hard telling if what makes sense to me makes sense to you. Does that make sense?)
Update: I originally posted directions for bag, in the top picture, on my farm blog in 2004...the directions are a little bit different so if you would like to read those and compare...click here
If you liked this craft project... check out my tutorial for a Quick and Easy Gift project


7 comments:
Thanks for stopping by at my blog. The Reindeer Gift Bag is wonderful!!! When I find the time I will make one for my son.....thanks for sharing ;)
Hi,
Just discovered your blog. My daughters and I use to make that same reindeer bag years ago. Love your art.
that is so cute! i have to do a craft for the third graders, and i have been so stressed about it! i want to use your idea! is that ok? love it!!
Julie
Hi Anke, Make a bag with your son.
Well unless he's 30 or something, but from the pictures you post I think he's just the right age to lend his hands and will have a great time crafting with Mom.
Hi, Dorothy! Welcome and thank you! It is fun to craft with our kids.
Thanks for entering my giveaway!
Julie, Thank you and of course you can use this idea.
I was a room Mom for my daughter's classes from Kindergarten through Sixth grade...
funny how in 7th grade I was forced into room Mom retirement.
I have tons of ideas for crafting with the kiddos.
I originally posted this on my farm craft page in 2004. I'll send you a link. There's some other ideas there.
Like using blush on the cheek area, how to draw the mouth (on the top bag), etc.
Thanks for entering my giveaway.
We LOVED this idea! My girls made their own and we posted a link to your picture on our website!! Come see us at http://www.holiday-kids-crafts.com
Post a Comment